
Car boot sizing guide
Measuring a car boot for a dog crate
Measure a car boot for a dog crate using annotated clearance diagrams, a fit-planning worksheet and a worked example covering hatch access and tailgate slope.
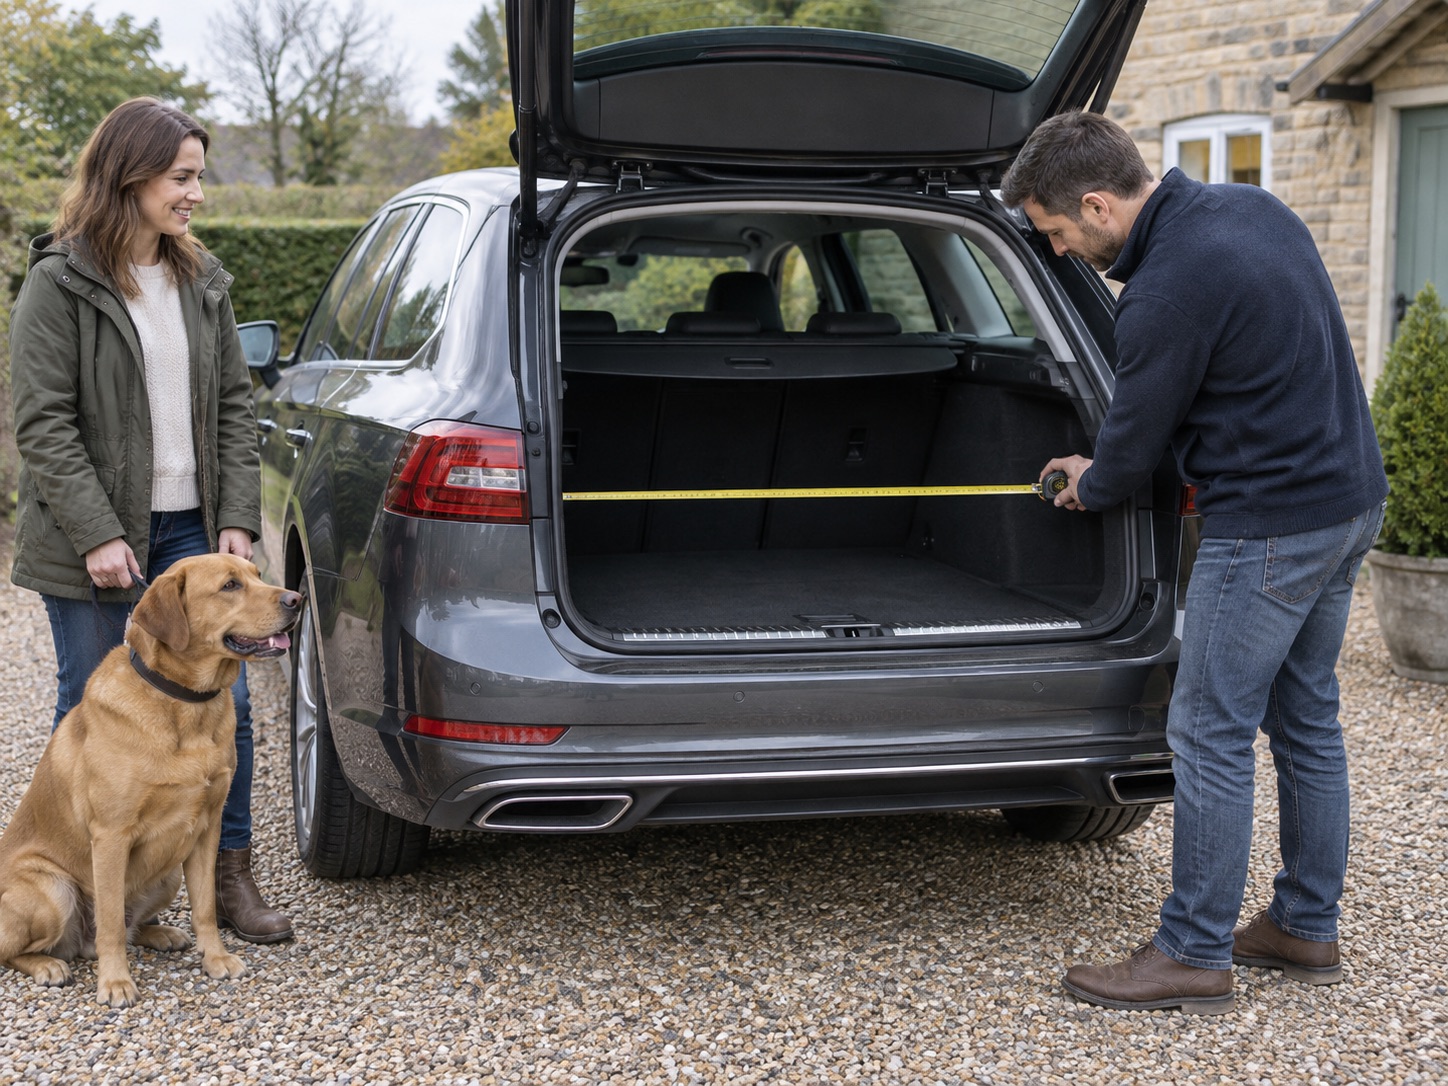
A crate must pass through the hatch before its floor dimensions matter.
Measure depth at both floor and roof height to catch tailgate slope.
Check door swing, cargo loops, ventilation and rear clearance with a cardboard outline.
Begin with the dog
Measure the dog's standing length and height, body width and relaxed lying position, then compare them with the crate's usable internal room. An external dimension tells you whether a box might fit the car, not whether the dog can stand, turn and rest in it. Refer to the exact maker's dog-sizing guidance, especially where a crash-tested design has a defined size range.
Take the boot measurements in this order
The hatch aperture
Open the tailgate fully. Measure the narrowest width between trim pieces and the lowest usable height beneath hinges, handles or interior panels. Include the loading lip. The assembled crate must pass through this opening without forcing; a folding product may pass in parts but still need to be assembled and anchored as instructed.
The usable floor
Measure depth from the rear seat or seatback to the inside of the closed tailgate, then width between wheel arches and other protrusions. Note whether the floor is level, whether a false floor moves, and where cargo loops sit. Do not count space behind a loose parcel shelf or under a moving seat.
The slope and roof line
At the likely crate roof height, repeat the depth measurement. In many hatchbacks the upper depth is much shorter than the floor depth. A sloping crate may follow that contour, but its internal headroom must still fit the dog. Measure the closed hatch carefully; do not let glass or trim become the back stop for the crate.
The door and installation envelope
Allow space for the main door to swing or slide, hands to operate the latch, and any specified rear escape route. Find the vehicle's approved cargo points. Record the exact manufacturer's installation envelope: built-in geometry and additional clearance are not the same thing. Thule describes Allax's crumple zone as built into the design and specifies a tension-band installation. Do not add a universal rear gap or automatically count a built-in allowance twice. Use the chosen model's installation diagram; other products may differ.
Annotated car-boot clearance diagrams
The two views separate getting the crate into the car from accommodating it once installed. They are planning schematics, not a scale drawing of a particular vehicle. Letters match the worksheet below. There is no universal number for door, anchor or rear clearance: use the exact crate instructions.
Your car-boot fit-planning worksheet
Copy these fields into your notes, or print the guide. Record all measurements in centimetres and preserve the same seat and boot-floor configuration throughout. Include handles, feet, latches and other projections in the candidate's outside profile. Where the supplier's measurement boundary is unclear, resolve it before treating the number as available clearance.
Scroll horizontally to see all columns →
| Space to record | Your vehicle / planned setup | Candidate and next check |
|---|---|---|
| Vehicle configuration | Make / model / year: ____; seats and floor position: ____ | Record the exact crate model, variant and adjustable-depth setting. |
| A — Hatch aperture | Narrowest width: ____; clear height above lip: ____ | Compare the assembled outside profile, projections and permitted loading path. |
| B — Floor envelope | Width between arches: ____; floor depth: ____ | Include the complete outside footprint and approved anchoring arrangement. |
| C — Upper envelope | Crate roof height: ____; depth and width there: ____ | Check the entire sloping profile, not just the floor rectangle. |
| D — Door and exit | Door / latch access: ____; rear escape access: ____ | Record the maker's door movement and any specified escape route. |
| E — Installation allowances | Anchor access / strap route: ____; required clearances: ____ | Use exact manufacturer instructions; distinguish built-in geometry from additional clearance. |
| Dog and ventilation | Interior L × W × H: ____; bedding: ____; air paths: ____ | Confirm natural postures and unobstructed ventilation independently of car fit. |
For a sloping boot or crate, record additional widths and depths wherever the outline changes. A single roof-height reading cannot prove that every intermediate point clears. The internal versus external dimensions guide helps separate this vehicle envelope from the space your dog actually occupies.
Worked example: a floor fit can still fail higher up
All figures in this example are invented to explain the calculation. They do not describe the Thule or CADOCA products, an actual vehicle, or a recommended gap. Imagine a rectangular crate body 84cm deep, 60cm wide and 60cm high, and the available spaces shown below.
Scroll horizontally to see all columns →
| Check | Imagined available (cm) | Imagined required (cm) | Available − required | Interpretation |
|---|---|---|---|---|
| Hatch width | 70 | 60 | 10cm | 10cm numerical remainder; loading path still unconfirmed |
| Hatch clear height | 65 | 60 | 5cm | 5cm numerical remainder; include the lip and projections |
| Floor depth | 95 | 84 | 11cm | 11cm numerical remainder before installation allowances |
| Depth at crate roof height | 78 | 84 | -6cm | 6cm short: this rectangular body conflicts with the slope |
The calculation is available dimension − required dimension. The floor leaves 11cm on paper, but the boot is only 78cm deep at the crate's roof height: the 84cm rectangular body is 6cm too deep there. Positive hatch figures do not prove the loading manoeuvre works, and a numerical remainder is not all spare space to use; approved anchoring and model-specific allowances can consume it.
An angled candidate needs its actual side profile compared with the closed boot profile instead. Do not trim a crate, compress the car's lining or reduce dog space to make a calculation look favourable.
Check the planned outline before ordering
Make a cardboard outline using the candidate's full external width, height, depth and slope, including handles or catches. With the car parked securely, take the outline through the hatch and compare it with the proposed installed position and closed-tailgate profile. Keep hands clear and stop if anything contacts the hatch; never force it. Repeat at the door-open position. If the outline works only when tilted sharply, confirm the real crate can be introduced that way without damage. A lightweight outline cannot verify the crate's actual mounting or restraint performance.
A compact CADOCA illustrates why a smaller published exterior is only a starting point: its angled body may fit the boot, yet the dog still needs adequate interior length and height. Check exact listing dimensions and the permitted way to secure it.
Record the measurements and seat position you used. If you change vehicles, remove a boot floor or move the rear seats, measure again before travelling. Finish with the car-crate installation checklist.
Common questions
Frequently asked questions
Which car boot measurement matters most?
There is no single number. The smallest hatch opening, wheel-arch width and depth at crate roof height often rule out a candidate that fits the floor.
Should I use the crate's internal or external dimensions?
Use external dimensions for vehicle fit and internal usable dimensions for dog fit. Published figures are often external, so ask the maker when unclear.
How much clearance should I leave behind a dog crate?
Follow the exact maker's installation instructions. Some car crates specify a designed rear space, so do not assume the crate should touch the tailgate.
Can a sloped crate fit a smaller boot?
Sometimes, but the slope may reduce the dog's headroom or usable length. Measure the boot at several heights and the dog in natural postures.
What if the crate fits only with the seats moved?
Treat the seat position as part of the installation. Check passengers, seat locking, anchor geometry and whether the crate maker permits that arrangement.
Does a positive clearance calculation prove a crate fits safely?
No. It only compares the two dimensions entered. The full profile must pass through the hatch and fit with the tailgate closed, while the exact mounting, door access, dog space and ventilation requirements still need to be met.
Sources
- Thule — Allax product and fit information
- Thule — Allax installation instructions
- GOV.UK — dog transport space and ventilation principles — licensing guidance used only for welfare context
- Amazon UK product pages linked from the product cards